
by Piggy Bank Parties
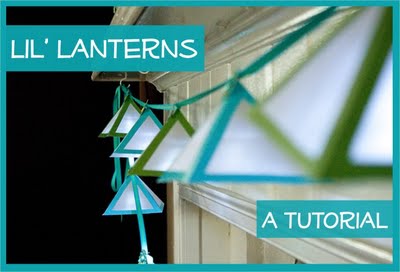
Tutorial - Do you want to create the perfect party mood. Lighting is one of the easiest ways to create ambiance. The problem—an electrical outlet isn’t always readily available. Today’s project by Piggy Bank Parties was designed to solve that problem.
Gather the following supplies
- 10’ of May Arts Ribbon per 5 lantern strand
- DCWV Adhesive-Backed Glitter Stack (1 sheet per strand)
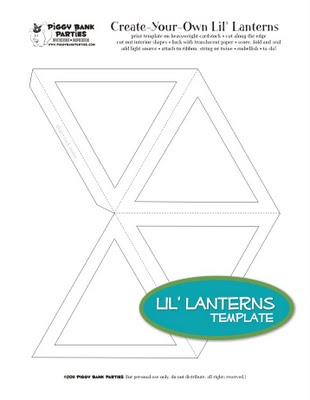
- Piggy Bank Parties Lil’ Lantern Template
- 1 sheet of 8.5” x 11” Heavy Cardstock
- Celebration Party Lights (1-3 per lantern)
- 8.5” x 11” Translucent Paper (1 per lantern)
- 4-Ply Irish Waxed Linen Thread (10” per light)
- 1/8” Hole Punch
- 1” and 1.5” Flower Punches
- Doodlebug Design Inc. Chunky Brads – Bon Appétit Assortment
- Glue Arts Ribbon Adhesive
- Craft Knife & Self-Healing Mat
- Ruler
- Scissors
- Pencil
- Bone Folder
Ready? Here we go...
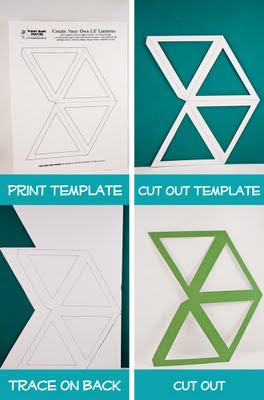
1. Download and print the Lil’ Lantern template on heavy cardstock.
2. Cut out the template using scissors on the exterior solid lines and a craft knife, ruler and self-healing mat for the interior solid lines. A ruler will help you cut a straight line when using a craft knife.
3. Trace your template on the back side of the Glitter Stack cardstock. Repeat 4 times to make a total of 5 lanterns. Cut out the lanterns just like you did the template. Set the interior cut-outs aside to create embellishments later.
4. Peel off the backing on the lantern and attach to a piece of translucent paper. {If your lantern cardstock is not adhesive backed, attach the lantern using an adhesive roller.} Trim around the outside edge.
5. Score along the dotted lines {refer to the template}, fold and crease using a Bone Folder. {Hint: Score on the back of the glitter cardstock. This will help prevent the paper from cracking and tearing.}
6. Punch a 1/8” hole at the top of the lantern {see photo}.
7. Add ribbon adhesive to the lantern flap, tuck under and seal.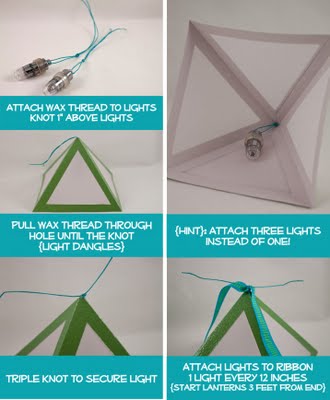
8. Add 1-3 Celebration Party Lights to 10” of Irish Waxed Linen Thread. Tie a knot 1” above the light. The knot allows the light to dangle and prevents it from going through the 1/8” hole.
{Designer Tip}: Irish Waxed Linen Thread is used in basket weaving and book binding. I discovered it 10 years ago and I use it for all types of craft projects. LoVe.
9. Pull the ends of the wax thread through the 1/8” hole at the top of the lantern. Tie a triple knot in the thread to keep it from falling back through the hole.
10. Tie the lantern onto the 10’ ribbon starting 3’ from the end. Then tie additional lanterns every 12 inches. There will be another 3’ length of ribbon after the fifth lantern. If you need longer strands, adjust your measurements accordingly.
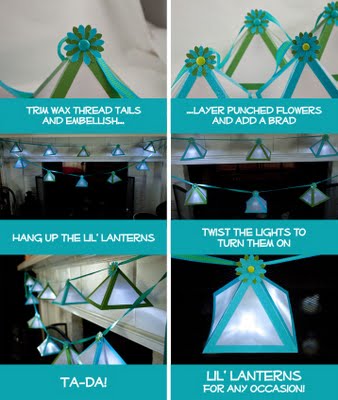
11. Trim the excess wax thread and add embellishments. The flowers shown were made from punching 1” and 1.5” flowers from the lantern cut outs. Peel off the backing, stack the flowers and add a brad in the center. Attach the embellishments near the top of the lantern.
12. Hang up the lanterns, twist the lights to turn them on and…Ta-Da! Lil’ Lanterns for any occasion! Hang them in trees for outdoor parties or anywhere you need a lil’ light!
The Crew at Piggy Bank Parties created the Lil’ Lanterns Template as a free download for you.
No comments:
Post a Comment