
by Holiday Crafts and Creations
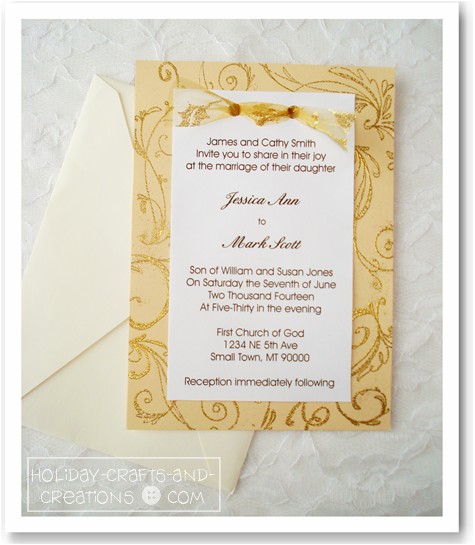
Looking for some easy homemade wedding invitation ideas? These invitations are simple to do, even if you’ve never done any rubber stamp crafts before, you could easily do this!
Materials For These Homemade
- Cardstock: 2 colors
- Craft rubber stamps
- Embossing ink
- Embossing powder
- Scissors
- Ribbon: 5/8" wide (soft mesh or lace)
- Paper hole punch
- Heating tool
Instructions For These Homemade
Begin your invitations by cutting out your colored cardstock in 5" x 7" rectangles.
You will just need one for each invitation.
Then create the wording of your invitation on a white rectangle that will measure 3-1/2" x 5-7/8". You can easily create a box (use a thin line) this size to work in by using a program such as Microsoft Publisher, and then typing your wording inside the box you’ve made.
Be sure to leave about 7/8" of blank space at the top of this box.
This is where the ribbon will later go.
Then after you’ve printed them, cut just barely in from the line of the box so you don’t have any black line showing.

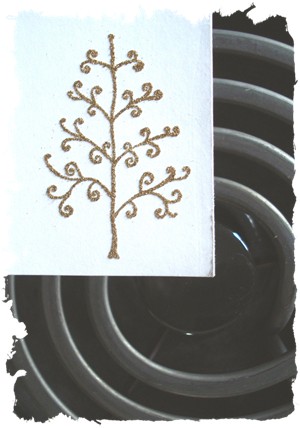
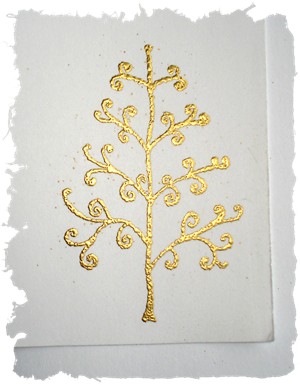
This step is the fun part! Pick out the stamp you will be using, and create embossed images all around the border of your cardstock.
To learn how to emboss with stamps, see below.
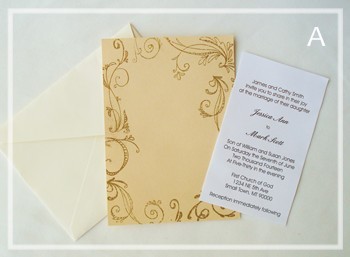
Be sure to pick out a color of embossing powder that will be noticeable on the color cardstock you have chosen. Once all your pieces of cardstock have been embossed, you are ready to start putting the invitations together. See photo A for an idea of how this should be looking.

In this step you will be attaching the two pieces of your invitation together. To begin, center the written invitation piece of paper on the embossed cardstock. You may want to place a little piece of double sided tape between the two, to hold them together while you are working. Place the tape near the top of the invitation.

Now you will punch two holes across the top of the invitation, through both pieces of cardstock. You may be limited on how far into the paper you can punch by the style of hole-punch. For example the punch we used would only allow us to punch in about 7/8". If you are using the size we did, this should be plenty. Punch them evenly in the center of the card, with a space in between of about 1". See photo B.

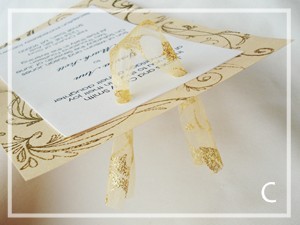
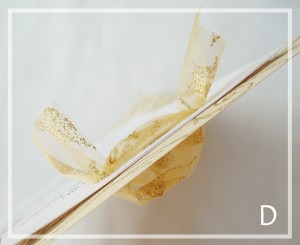
Now cut a 7" length of ribbon or lace for each invitation. To create the bow on your invitations, start by threading each end of the ribbon through a hole, starting from the front side. See photo C. Be sure to center the ribbon so you have equal amounts of tail on each side.
Now from the backside, cross the two tail ends over and poke them back through the opposite holes to the front side. See photo D. At this point your bow is basically done, but you may want to adjust the bow a little and trim off the ends to your preferred length.
Now you know how to make wedding invitations that are both classy and fairly easy to construct.
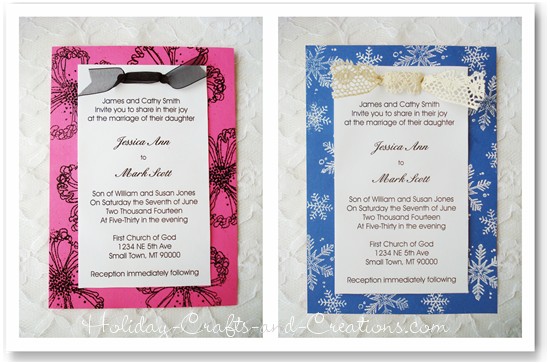
Here are two more examples of this invitation. One for a spring/summer wedding and one for a winter wedding.
Embossing Stamps
Embossing stamps is quite easy, and gives a very professional look to whatever you may be making. Many of the tools needed are optional and we will go through the various ways you can go about embossing.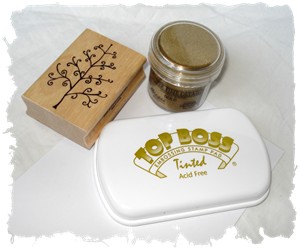
What You Will Need:
Desired rubber stamp
Embossing powder
Embossing ink or regular ink
Heating gun (sold in craft stores) or other heat source
Dryer sheet or other anti-static product
Paper to work on
Step 1:
Make sure the paper you will be stamping is clean. Next, apply the anti-static product on the paper. This is an optional step, but it prevents extra powder from clinging to the paper. However, rubbing a dryer sheet or fabric softener sheet on the paper should work pretty well, and usually they are on hand.

Step 2:
Ink your stamp with the embossing ink. You can use regular stamp ink as well, but embossing ink is designed to stay wet longer so you have time to get the powder on. Embossing ink comes in colors, but also clear or tinted. If using clear or tinted, the stamp will end up whatever color the embossing powder was. In most cases, you won’t see the ink underneath anyway.
Step 3:
Open the embossing powder and pour it on the stamped image. Be sure to cover the stamped image completely. Have another piece of paper underneath the one you are stamping on to catch the excess powder. Then pour the powder off, and back into the container. You can lightly tap behind the stamped image to get any extra off.
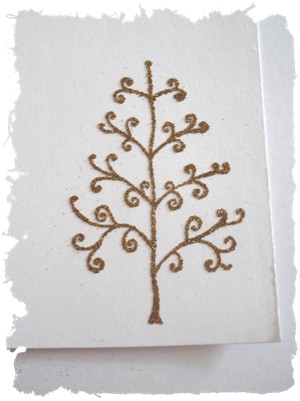
It is important to get any loose, clinging powder off that is not a part of the image because once it has been heated the flecks melt permanently on the paper. Once you think the stamp looks good, you are done with this step.
Step 4:
Heating the image can be done in a few ways. The most common heat source when embossing stamps is to use a heating gun. These can be found at most craft stores and are made for this type of project. If using a heating gun, it is held above the image until the powder melts.
Another way of heating is to use a hair dryer. Of course since this blows air, it must be heated from underneath so as to not blow the powder off before it has melted.
A third technique, which we normally use, is to heat the stamp over the stove. When heating this way turn the stove on low heat and hold the paper above the stove. Note: DO NOT SET IT DIRECTLY ON THE STOVE! This could potentially start a fire and is very dangerous. When heating it over the stove, be very careful, and do not get the paper too close. If your stove has a pilot light, DO NOT USE THIS METHOD! It would be very easy for the paper to light on fire. Children will need adult supervision for this step.
With any of these heating techniques, you should see the powder melt. As soon as this happens you can remove the heat source and you are done! Hopefully you'll now see just how fun and easy embossing stamps can be!
No comments:
Post a Comment