
Fondant Lace Wedding Cake
by At Second Street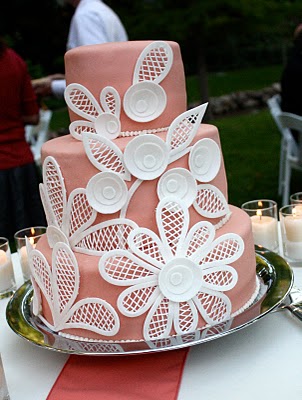
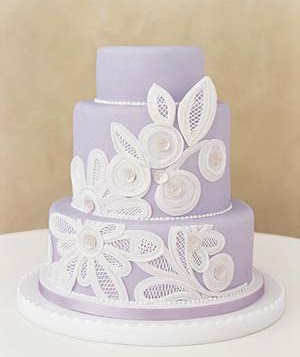
From the author of this tutorial - I am happy to share with you how I put this together. I'll warn you now that I am no baker and don't really know what I am doing. I read other blogs and then just kinda make stuff up as I go.I wanted to make the cake look like this cake from Real Simple Weddings. It was very helpful to have a clear vision before starting.
I baked my cakes the day before using (see recipe below recipe). I was able to fill a 12", 9" and 6" pan with each batch of cake batter. I made three batches. Each tier had three layers. I wanted the middle layer to be a little taller, so I filled that pan a little fuller each time.
After they cooled I trimmed the tops, stacked them (with parchment paper in-between the layers), wrapped them in plastic and put them in the freezer.
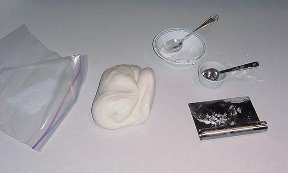
While my cakes were baking I made 3 batches of fondant using (see recipe below recipe). I really only needed two batches, but I wanted extra in case there was a problem.
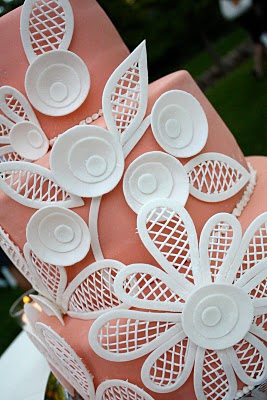
Once I was done baking and making fondant I started constructing the decorations. The flowers and outer edges of everything else was made of fondant mixed with TYLOSE. I found this tip from Janel at MacKenzie's Crafty Mom, mixing Tylose powder with the fondant makes it harden. I mixed 1/4-tsp with 1/4 a batch of fondant.
Janel also used a pasta machine in her post. Can you imagine how thrilled I was to find a pasta machine in my basement a few weeks ago. My moth-in-law gave it to me years ago and I forgot all about it. This machine made all the difference in making my decorations.
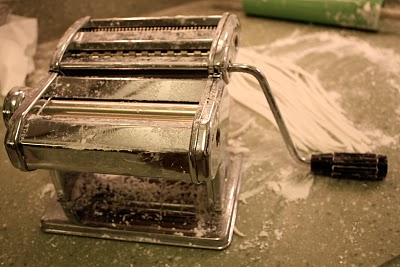
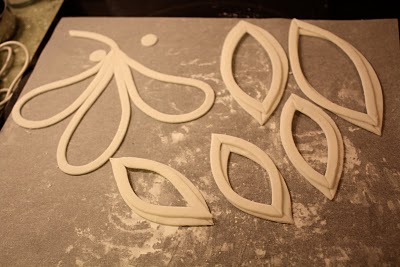
I rolled out my tylose fondant, ran it though the flat part of the machine a couple of times to make it thinner. Then I ran it through the noodle cutters to get these long strips.
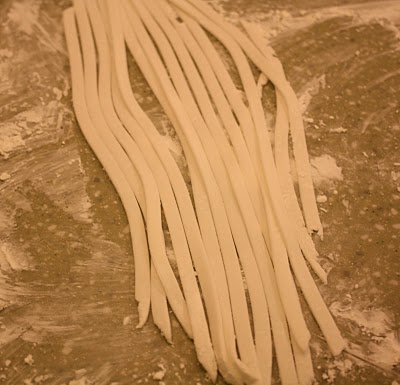
I used the long strips to form all my shapes. A paint brush and water worked great for glueing my pieces together. When I was done I let them dry over night.
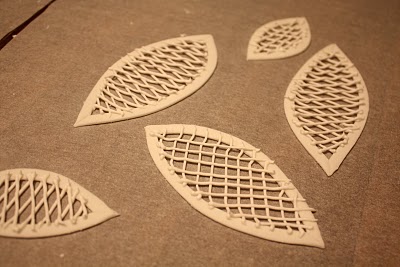
The next morning they were hard and I started piping the lattice work. I would recommend doing this the day before too, but I was too tied. I piped the lattice work with royal icing and it took a couple hours to dry. Since it was on parchment paper once the icing dried the pieces could be picked up and used as I needed. HERE is a good post about royal icing lattice work. I made mistakes, if I couldn't live with them I would break off the lattice work clean up the shaped fondant and pipe it again.
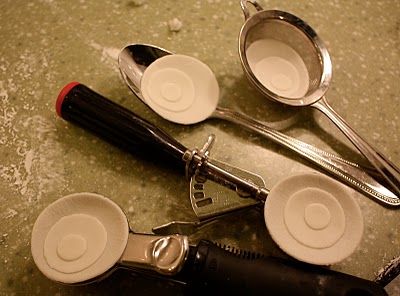
For the flowers I ran another piece of tylose fondant through the pasta machine machine until it was quite thin. Then I used Wilton circle cutters to cut three sizes of circles out. I glued one on top of the other (off centered) with water. Then I laid them in various spoons and things to dry over night.
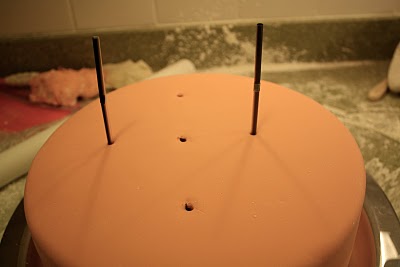
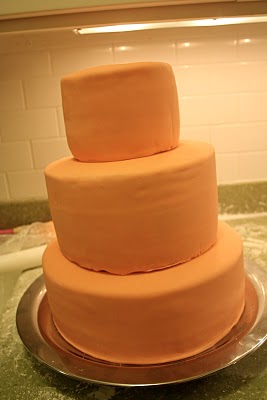
While my lattice work was drying I frosted the cakes and covered them in fondant. To stack them, I used straws dowels. They were a lot easier to cut than wood.
My fondant was my biggest problem. When I did my practice cake it was the easiest part, so I wasn't worried. I think I may have tried to rush myself and rolled it a little to thin. I was really embarrassed at how bad it looked. I was grateful to have big decorations to cover it up.
Take your time and don't skimp on the fondant.
Millie’s White Wedding Cake Recipe
by Dine and a Dish
- 2 (18 ounce) boxes white cake mix (Betty Crocker or Pillsbury)
- 2 cups all purpose flour
- 2 cups granulated sugar
- 1 1/2 teaspoons salt
- 2 2/3 cups water
- 1/4 cup vegetable oil
- 2 teaspoons real vanilla
- 2 teaspoons almond extract
- 2 cups sour cream
- 8 large egg whites
Pour into greased and floured cake pans or cupcake liners, filling each slightly over half full.
Lightly tap cake pans on counter to bring air bubbles to top.
Bake in preheated 325° F oven until cake tests done.
Baking time varies according to the size and depth of pans being used.
MM (Marshmallow) Fondant Icing Recipe
 |
Ingredients:
16 ounces white mini-marshmallows(use a good quality brand)
2 to 5 tablespoons water
2 pounds icing sugar (please use C&H Cane Powdered Sugar for the best results)
1/2 cup Crisco shortening (you will be digging into it so place in a very easily accessed bowl)
Directions:
NOTE: Please be careful, this first stage can get hot.
Melt marshmallows and 2 tablespoons of water in a microwave or double boiler. To microwave, place the bowl in the microwave for 30 seconds, open microwave and stir, back in microwave for 30 seconds more, open microwave and stir again, and continue doing this until melted. It usually takes about 2 1/2 minute total.
Place 3/4 of the powdered sugar on the top of the melted marshmallow mix.
Now grease your hands GENEROUSLY (palms, backs, and in between fingers), then heavily grease the counter you will be using and dump the bowl of marshmallow/sugar mixture in the middle. (By the way, this recipe is also good for your hands. When I’m done, they are baby soft.)
 |
Start kneading like you would bread dough. You will immediately see why you have greased your hands. If you have children in the room they will either laugh at you or look at you with a questioning expression. You might even hear a muttered, “What are you doing?”
Keep kneading, this stuff is sticky at this stage! Add the rest of the powdered sugar and knead some more. Re-grease your hands and counter when the fondant starts sticking. If the mix is tearing easily, it is to dry, so add water (about 1/2 tablespoon at a time and then knead it in). It usually takes me about 8 minutes to get a firm smooth elastic ball so that it will stretch without tearing when you apply it to the cake.
It is best if you can let it sit, double wrapped, overnight (but you can use it right away if there are no tiny bits of dry powdered sugar). If you do see them, you will need to knead and maybe add a few more drops of water.
Prepare the fondant icing for storing by coating it with a good layer of Crisco shortening, wrap in a plastic-type wrap product and then put it in a re-sealable or Ziploc bag. Squeeze out as much air as possible.
MM Fondant icing will hold very well in the refrigerator for weeks. If I know that I have a cake to decorate, I usually make two (2) batches on a free night during the week so it is ready when I need it. Take advantage of the fact that this fondant icing can be prepared well in advance.
Definitely I am going to try this! Wow! Im so impress ! Thanks~!
ReplyDeletelove this - I will be trying this. It has the wow factor. Love it.
ReplyDeleteBarb - Cookies, Cupcakes & More
www.gourmetcupcakebakery.com
Love ur cake...this one imparticular.....I am as you..."self made" cake maker....lots of research and even more imagination.
ReplyDeleteThis really is just gorgeous! Thank you for the tutorial. I will definitely try this as it is so effective!
ReplyDeleteAwesome!!!!
ReplyDeleteI wouldn't have been able to figure it out on my own except for your fantastic tutorial .
Thanks so much!
ooooo love it love it love it!!!!
ReplyDeleteThis comment has been removed by the author.
ReplyDeleteLovely cake and a great tutorial, thanks so much, I will try it one day.....:-)
ReplyDeleteHow did you get the heavy pieces to stay on the cakes?
ReplyDelete