
by Frogged Knits and Melisa Darnieder

Pattern and How-To - Something old, something blue. Make this beautiful garter. Very unique.
Pattern - Make this classic bridal garter.
Materials
cotton thread - size 30
crochet hook size 7 (1.65 mm)
1/4 inch wide blue ribbon
thin elastic cord
sewing notions
Gauge
The length of the garter is customizable. Research on the internet tells me that the standard thigh is 20-22 inches. The size I am working for is 24 inches. To this, I have added 2 inches to provide some gathering in the material. My total length is 26 inches.
Center Section
Throughout the pattern for the center section, the turning ch 2 is not counted as a hdc. Work this section to the desired length by repeating rows 3 and 4. Complete a number of rows equal to a multiple of 4, ending with row 3.
- ch 10, hdc in 3rd ch from hook and in next 7 ch, ch 2, turn (8 hdc)
- hdc in first hdc, ch 2, skip next 2 hdc, hdc in next 2 hdc, ch 2, skip next 2 hdc, hdc in final hdc, ch 2, turn
- hdc in each hdc across, with 2 hdc in each ch2 space, (8 hdc total), ch 2, turn
- repeat rows 2 and 3 until pieces measures the desired length. Make sure that you have completed a number of rows equal to a multiple of 4, ending with row 2, ch 3, turn
To get 28 inches, my version was 192 rows long.
Edging
The edging is worked along each side of the garter. The instructions below will get you through the first side and then you just repeat on the other side of the center section.
- Make 2 dc in each row across the side, counting the first turning ch 3 as the first dc. Make sure to get one stitch on the foundation row. You should have twice as many double crochets as you had rows, plus 1. I have 385 stitches. ch 3, turn
- 2 dc in 1st dc, skip next 3 dc, (dc, ch 3, dc in next stitch), *skip next 3 dc, 5 dc in next dc, skip next 3 dc, (dc, ch 3, dc in next stitch), repeat from star across, skip next 3 dc, 3 dc in last dc, ch 1, turn
- sc in 1st dc, 5 dc in next ch 3 space, *skip next 3 dc, (sc, ch 3, sc) in next dc (this is the middle dc of the 5dc group), 5 dc in next ch 3 space, repeat from star across, skip next 3 dc, (sc, ch 3, sc) is last dc, cut thread and finish off.
Assembly
Make sure to block to get the proper stitch definition, paying particular attenting to the ch3 loops on the outside rows. After blocking, sew into a ring. Thread the ribbon and elastic through the openings in the center of the garter, making sure the elastic is hidden behind the ribbon. Sew the two ribbon ends together, making sure to leave enough ribbon to stretch to the desired length. Sew/tie the elastic together to the desired length.
Pattern & images © 2008 by Melisa Darnieder. Personal use ONLY. Commercial use, including selling items made from this pattern, is prohibited. All rights reserved.
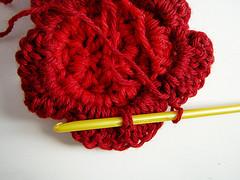
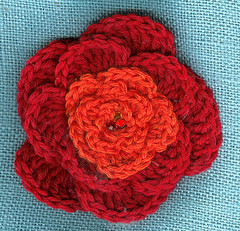
5-Petal Flower
Pattern for the flower is from SkaMama's blog.
No comments:
Post a Comment