
by LaChelle at Sugar Dutchess
Tutorial - Here is a fabulous tutorial by the very talented LaChelle at Sugar Dutchess. This would make a fabulous cake topper for your wedding.
NOTE: All the words and images belong to SugarDutchess
Oh, and before we begin, know that this involves lots of waiting for stuff to dry. So, patience. I made this from start to finish just short of 48 hours.
What You Need
Meringue PowderConfectioners' Sugar
Wax Paper
round tip #3.
tip #2.
round tip #1 or #2
Step One
You need a pattern to follow. I pulled up Google Images, and looked around for a basic, proportionally-correct line drawing of the Eiffel Tower from a straight-on view.
This is the drawing I settled on. Print it off, whatever size you’d like.
Next I divided the drawing into four sections vertically. Like this:
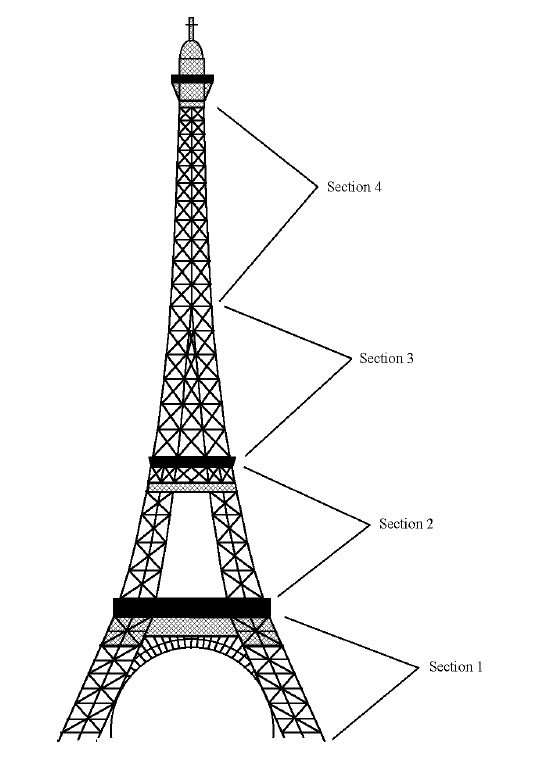
Here’s what you have to remember: Yes, the edges of the Eiffel tower curve upward. But don’t pipe them that way — your four sides won’t fit together. If you divide the tower into smaller sections vertically and pipe all the outer edges as straight lines, it will still give the illusion of a curve, but the edges will fit together when you go to assemble it. Does that make any sense?
Step Two
Take some wax paper and a pencil, and very, very carefully trace each individual section, five or six or eight times. Plan on some of the pieces shattering. They will. On the outward edges of each piece, use a straightedge to get a straight edge (heh). The outer edges of some of the sections will curve slightly, but ignore that. Make it straight.For construction purposes, you want all the outer lines as straight and uniform as you can conceivably make them.
Step Three
You need royal icing. This recipe from Wilton works for me. A single batch will be plenty. Color the icing gray. Or bright green. Or whatever you want. White could be kind of cool.Step Four
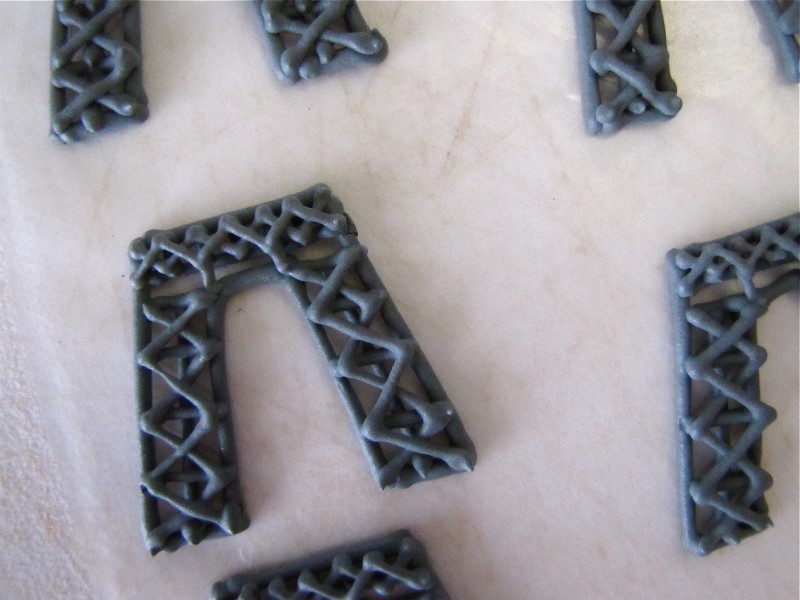
Very carefully pipe your royal icing directly onto the wax paper, following your pencil lines as closely as possible.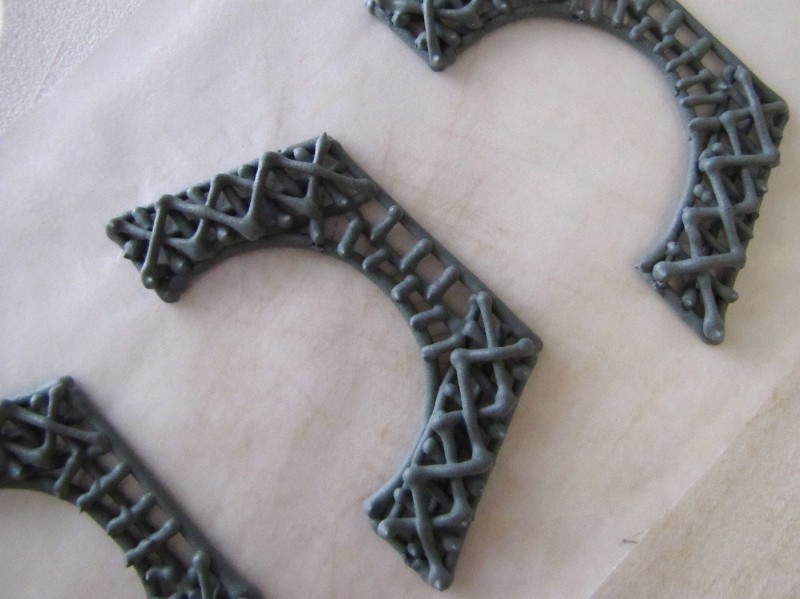
Here’s the order I piped in, and the tip sizes:
1. The outline – round tip #3.
2. Any major vertical or horizontal inside lines – tip #3.
3. All the other, shorter vertical or horizontal lines – tip #2.
4. The diagonals (x’s) – round tip #1 or #2.
By the time you’re piping step 3, the shorter vertical and horizontal lines probably won’t even touch the wax paper. And the x’s will just be laying on top of the rest of the lines. That’s okay. It will look better if you focus on getting straight lines, than if you try to get all the lines to sit in the same plane as the first ones you piped.
Step Five
Get away from the kitchen and relax those hands. These pieces will need to dry for at least 6-8 hours, or overnight.Step Six
Once all the icing is completely dry, you have to remove each of these ridiculously fragile panels from the wax paper. Without breaking them. I’m not sure what to say to you, other than . . . good luck. I hope you made extras.Actually, I can offer a bit of advice. Here’s the way I do it: Lay the wax paper flat on a countertop or table. Bring the wax paper to the edge of the surface, slowly pulling the paper downward over the edge, while carefully holding on to the royal icing piece. The royal icing pieces should release from the wax paper in one piece. Theoretically. If you do it too quickly, your pieces will shatter. And sometimes you have to approach a piece from a few different angles.
If that method doesn’t work for you, you can try leaving the wax paper on a flat surface and gently running a very thin knife under each piece to release it. I end up with a lot of broken pieces that way, but it works for some people, so it’s worth a try.
And here’s one last tip: If a piece does break, but it’s only broken into two pieces, you can always try gluing it back together. Put a dot of icing on the break points, very gently put the pieces back together, and let it sit on some wax paper for at least an hour.
Step Seven
Now you get to start gluing the panels together! (Glue = more royal icing). This was the trickiest step for me, where I broke the most pieces. That’s probably not what you wanted to hear after all you’ve been through. Sorry. But remember that part about these pieces being super fragile? Still applies.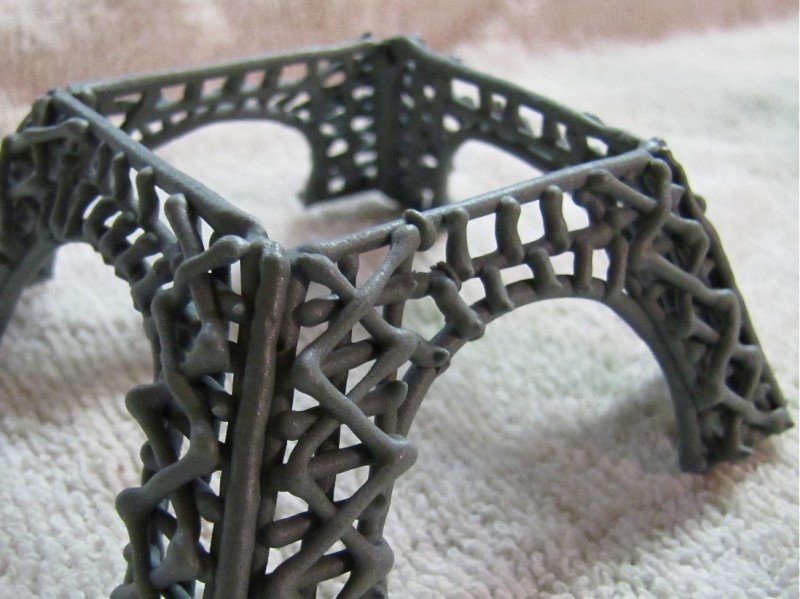
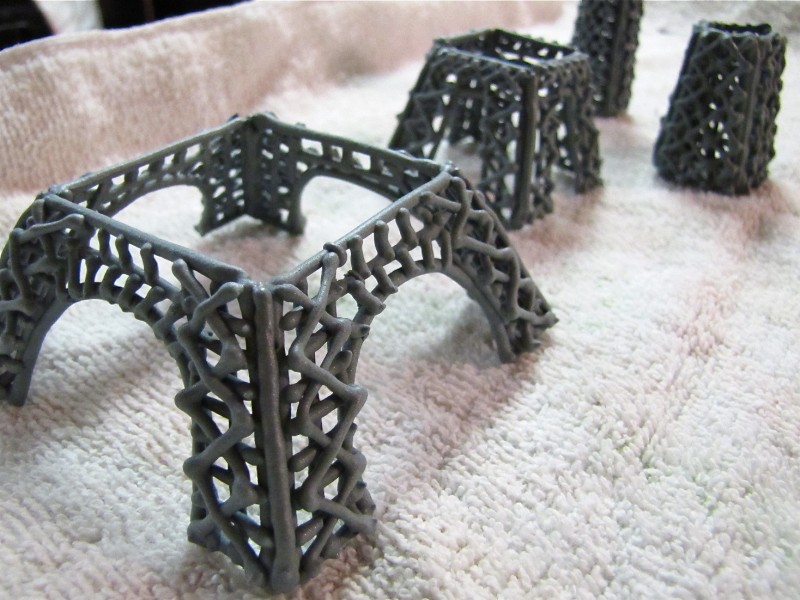
I worked one section at a time, “gluing” two pieces to each other, then the other two pieces to each other, making two halves of each section. Did that make any sense? Basically, you don’t glue all four sides of a section together at the same time. Glue sides one and two to each other, and sides three and four to each other, and then let them dry (standing up) for 4-5 hours, then glue those two pieces together and let that dry for another 4-5 hours.
As you can see from the photo, I let them dry on a towel rather than a smooth surface. This just added some friction so my half-dried panels would “stick” to the surface they were drying on.
When you’re gluing your panels together, make sure the top lines always form a 90-degree angle. When all four pieces of a single layer are glued together, you want them to form as perfect a square as you can manage. And let it all dry standing up. Like in the picture.
Step Eight
Yay! Time to stack them!Take your Section 2, and pipe your royal icing along the bottom edge. Very gently settle Section 2 onto Section 1, checking from all angles, including the top, to make sure it’s straight and that the corner seams line up. Let that dry for about 1 hour, then grab Section 3 and repeat. Continue until all four levels are glued together, then let the whole thing dry for 4-5 hours.

Step Nine
Look at what you just did! You made a 3D tower out of sugar! All that’s left is the finishing touches. Pipe horizontal lines (tip #2) around the seams between each level, and then a vertical line the entire length of the tower, on each of the corners. This helps to hide some unsightly icing seams, and gives a bit more visual continuity to the whole structure.Using a larger round tip (#8 or 9), pipe a small mound, or dome, that’s about as big around as the top of your tower. And then pipe a tiny line (tip #2) for the rod on top. Actually, these can be done back in Step 4 so they have plenty of time to dry. Use a dot of icing to glue your dried rod to the dried dome, then glue the dome to the top of your tower. Allow this to dry.
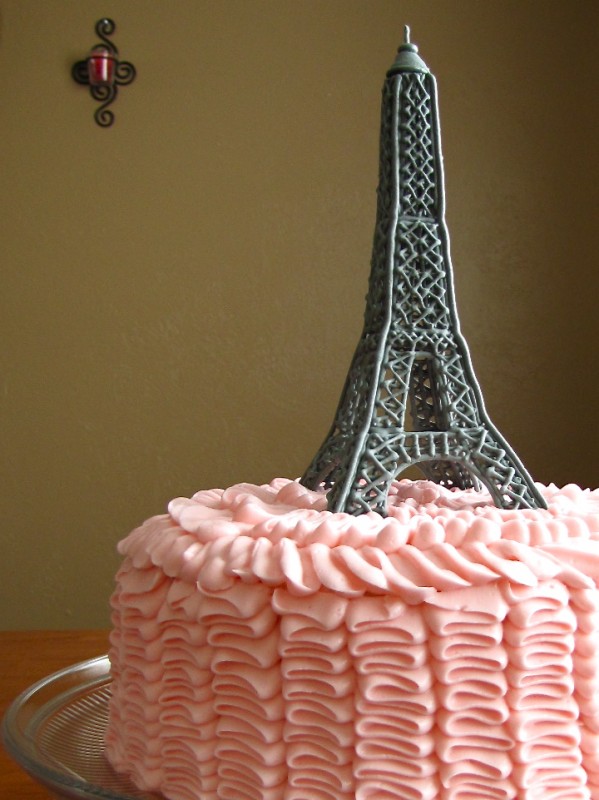
Step Ten
There has to be a step ten. This is the part where you put your creation on your cake and wow your friends and family, and take lots of pictures. This step makes the other nine totally worth it.NOTE: All the words and images belong to SugarDutchess
No comments:
Post a Comment