
Making your own boutonniere is an easy DIY wedding task that can save you money without a lot of time or difficulty. Houston wedding planner and floral designer Dennis Kutach will take you step-by-step through an easy way to make your own boutonniere.
Although there are several steps, each of them is very quick and easy. A beginner can make this boutonniere in less than 5 minutes. You'll need to buy some floral supplies, but especially if you are making bouquets that will also need those supplies, you can easily cut your floral bill in half.
If you have a refrigerator with no fresh produce in it (the produce gives off an enzyme that wilts flowers), you can assemble the boutonniere up to two days before the wedding. Otherwise, make it the day before the wedding, and store it in a cool place.
Supplies You'll Need

Before you get started, you'll want to pull together what you'll need.
For each DIY boutonniere you want to make, you'll need:
- 1 bloom from a stalk of cream or white dendrobium orchid.
- 1 piece of variegated lily grass
- 1 piece of soft-gauge cloth-covered florists wire
- 1 crystal-headed accent pin (optional)
- waxed florists stem-wrap tape, medium green
- 1 pearl-head boutonniere pin, 1.5"
Wire the Orchid
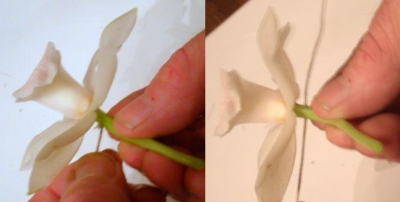
Hold the bloom in one hand, and then poke the soft-gauge florist's wire straight through the base of the stem, as pictured.
Bend the Wire

Add an Optional Crystal Accent Pin
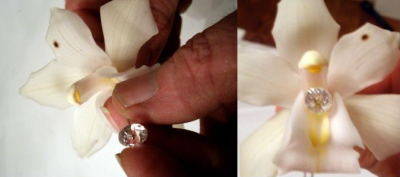
But many couples like to distinguish the groom by making his accessories slightly different from the others. A crystal accent pin is an easy way to add a little sparkle to his boutonniere. Simply insert the pin directly into the center of the bloom.
Secure with Florists Stem Wrap Tape
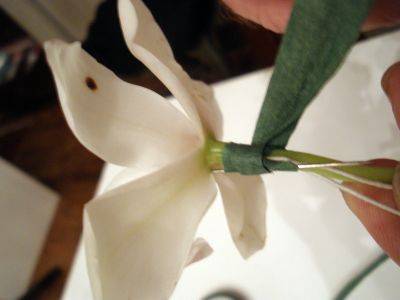
If you have used a crystal accent pin, you'll want to make sure that you completely cover the sharp end of the pin with tape, so that you won't stab yourself while you are working.
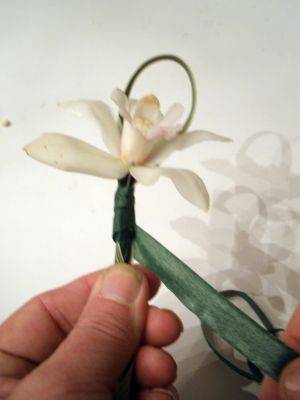
Add the Lily Grass

Secure the Lily Grass and Tape
Trim and Finish
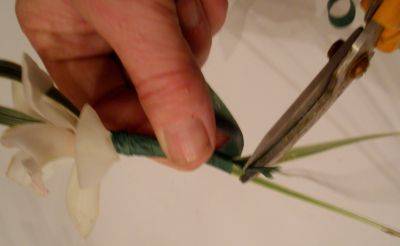
Tada! You've made your first elegant and easy boutonniere! You probably now have the supplies to make a dozen more, if you'd like.
How to Store and Pin Your Boutonniere
If you have a refrigerator without ANY fresh fruits or vegetables in it, then store it in the fridge for up to 2 days. Otherwise, put the plastic bag in a cool spot for up to a full day.
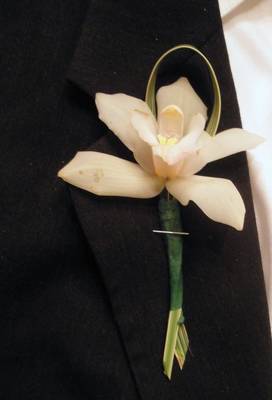
Just before the wedding, pin the boutonniere on the groom. (It's best to have someone other than yourself to pin it on you.) Place the boutonniere on the center of your lapel. From the back of the lapel, insert a pearl-headed boutonniere pin, cross over the stem, and reinsert into the fabric.
With this easy orchid boutonniere, you're a sharply dressed and elegant man, ready to head down the aisle and get married.
No comments:
Post a Comment