
by Ruffled
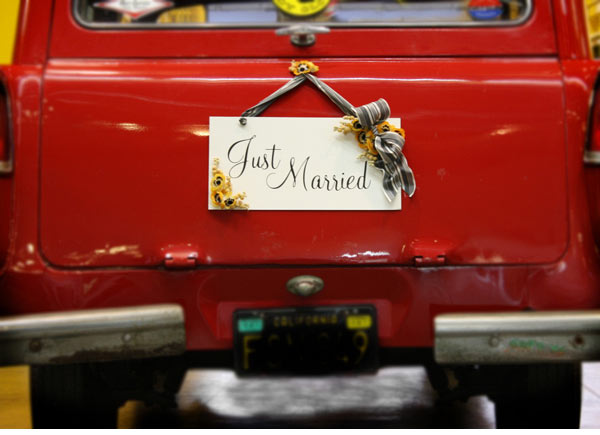
Create this fabulous DIY Just Married sign to decorate the getaway car.
This DIY project was sent by Erin, who created this Just Married sign to decorate their getaway car.
What you’ll need
- The Just Married Template. Erin graciously shares the template which can be downloaded here.
- 11×17 printer paper in the color of your choice
- A printer
- A thin piece of cardboard or illustration board
- Spray mount
- Cutting tool (scissors, a box cuter or a paper cutter)
- Ribbon
- Suction Cups
- Glue Gun
- Super Glue
- A hole-punch
- Decorations (Fake flowers, shells, buttons, feathers, lace etc.)
- Black and white ribbon (http://www.timelytresses.com)
- Vintage millinery anemones (http://stores.ebay.com/Vintage-Millinery-Flowers-Shoppe)
- Vintage pom-pom millinery (can be found on eBay or Etsy)
Step 1: Print out your template onto a piece of paper. You can print on any color paper to customize it a bit.
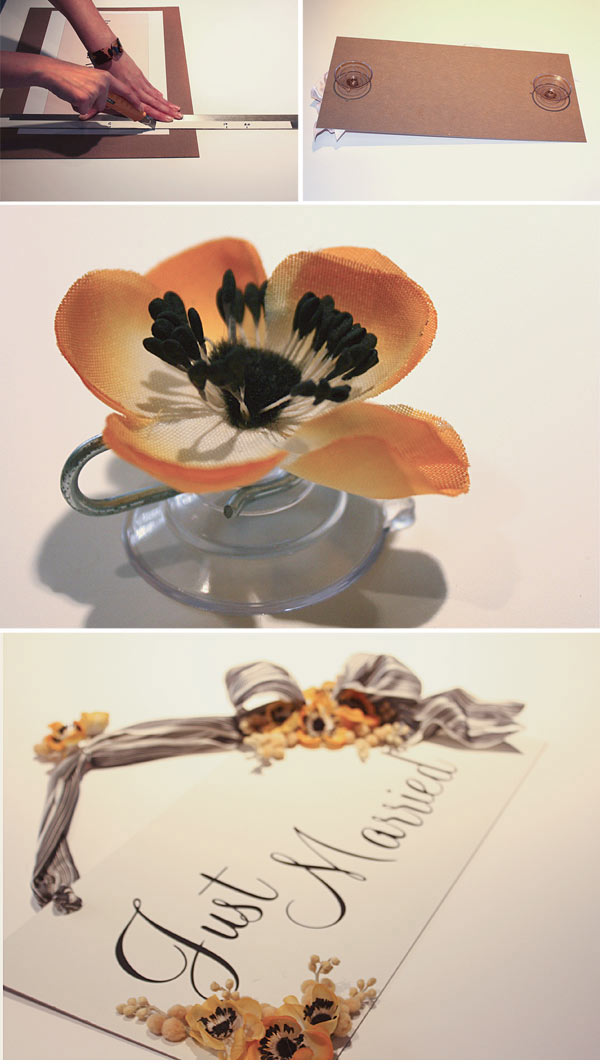
Step 2: Glue your paper to a piece of scrap cardboard with spray mount.
Step 3: Trim out your sign. I used a t-square & box cutter, but you can use scissors or a paper cutter if that works better for you.
Step 4: Using a hole-punch cut two holes in the top of your sign where you can add ribbon. I pulled my ribbon thru, tied it in knots and glued it. Then I just added a suction cup to the top of the ribbon and glued a flower on top of it. Most suction cups come with a hook so you can hook your ribbon on. This will give your sign the appearance of hanging from a ribbon when you attach it to your back window.
Step 5: Add ribbon & vintage millinery flowers using a hot glue gun. This is where you can get creative and throw in colors you are using for your wedding. Instead of flowers you could use shells, lace, feathers, buttons or just about anything else that will stick and won’t be too heavy.
Step 6: Glue your suction cups to the back of your sign. I like to use super glue gel to put them on. Once the super glue has dried I reinforce them by going around the base of the suction cup with the glue gun.
Step 7: Attach your sign to the back of your car window or the back of your car. The suctions cups will hold to either surface.
No comments:
Post a Comment